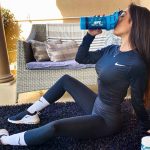
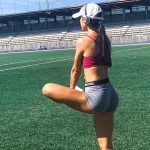
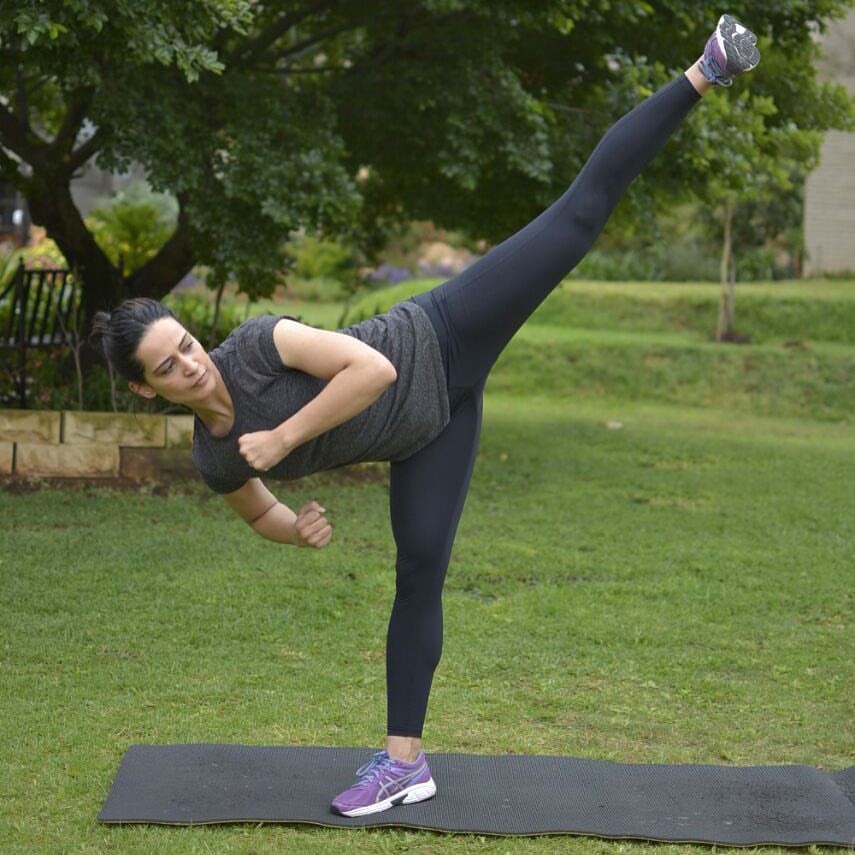
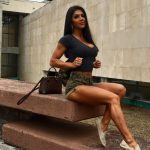
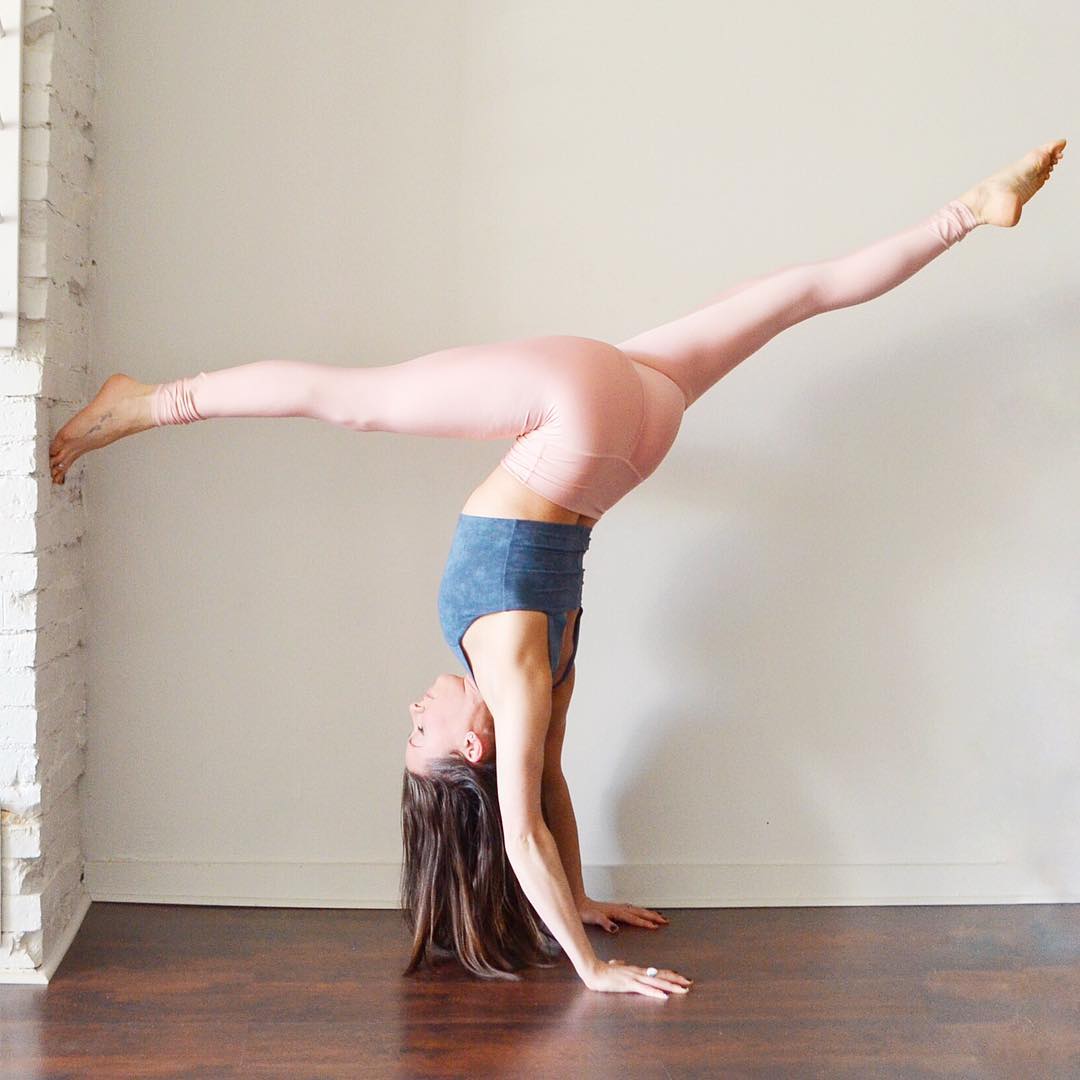
Alexzandra Peters is a Yoga Instructor amongst other things and she shows some great ways to get started in certain stretches and poses. These starting points can really help you get to the final stretch and to become more and more flexible. Remember though, it takes patience, commitment and consistency 🙂 


If This Is Your Goal, Start Here! Yoga With Alexzandra peters Pt1


Standing head to knee – I remember the first time I was asked to do this pose. It was in my very first yoga class – and a hot yoga class. I think I actually tried it and then laid in savasana for the last 30 minutes of class – I’m not kidding. Eric and I took our first yoga class together and it probably shouldn’t have been a hot one?. We laid in savasana for 30 minute and contemplated on leaving the room 50 times because it was so intense. – But I loved it and became addicted to hot yoga (not so much Eric??). AND it’s one of the reasons I because a teacher. But back to Standing knee. It’s a pose that doesn’t look ‘that hard’, but its pretty intense. A pose that requires a lot of practice. You’re working on your balance, flexibility and strength at the same time! Something that made this pose accessible to me was using a strap- -DON’T BE AFRAID TO BRING A STRAP TO CLASS IF THE STUDIO DOESN’T OFFER IT. Warm ups: 5 sun salutation, down dog, forward fold, seated head-to-knee pose, pyramid pose, eagle pose, tree pose, Tips: keep ground knee slightly bent (prevent hyperextending it). Lifted leg parallel to the floor with toes flexing towards face. Elbows to touch calf’s Big toes presses into the floor to stay grounded.❤️ Tuck your chin to chest and round the spine. _ you’ll notice my spine is long in the photo – slightly different variation, I was looking for my length and depth.

A post shared by Yoga Instructor•Reiki•Thai YM (@alexzandrapeters) on

This is one of my favorite variations of handstands! Why? A few reasons: I’ve always thought it was beautiful, the amount of hard work it takes to achieve it, and the gratitude you find along the way to the journey of this handstand variation. ** THIS IS NOT A POSE YOU SHOULD PRACTICE IF YOU ARE NOT READY FOR IT. This handstand is extreme, and if you are not warmed up properly or ready for it, you could do some serious damage on your body – especially your spine. When you practice this pose away from the wall it will add a lot more compression – so make sure that your ready for it, and ready to move away from the wall. ** I recommend having your scorpion handstand before attempting this. Use the wall for practice. Use your feet to press into the wall while shifting your view forward to the wall in front of you. FIND YOUR LIMIT (a space that challenges you but you are still able to be in control and breathe properly). From there, you would work on hovering your feet off of the wall. Legs are straight and engaged. Push out of the shoulders. Check in with yourself! Are you feeling pain anywhere? If yes, come down. Are you fully breathing? If no, ease off the bend a little bit till your sipping full rounds of inhales and exhales.

A post shared by Yoga Instructor•Reiki•Thai YM (@alexzandrapeters) on

Wild thing use to be extremely intimidating for me – especially when I was a beginner just starting to go to classes. It took me about 10 classes of finally figuring it out – but because I “figured it out” it doesn’t mean that I could still actually do it properly – AND THAT’S OKAY. As a teacher, we don’t expect that of you. We just love that your trying ? Wild thing is hard AF. It’s a side plank and basically a backbend all at the same time. So maybe your backbend isn’t quite there yet, and its really hard for you to place that foot down. At home, try stacking a few blocks and find YOUR comfort level and work on removing the blocks when YOU ARE READY. Later in my stories (probably around 4:30), I’ll demonstrate a simpler way to get into this pose. Most of the time we enter it from 3 legged dog – and that can be a bit intense for some!✨❤️

A post shared by Yoga Instructor•Reiki•Thai YM (@alexzandrapeters) on

Puppy pose is one of the yummiest asanas from my body! I love the shoulder & thoracic spine stretch ? *bonus: it feels wonderful to do this pose on the ground or on the wall– I recommend trying both! If you swipe left and check the video out, you’ll see me progress in different variations of Uttana Shishosana. Stick to the variation that feels best on YOUR BODY. The pose should never be forced, you should never feel pain in any pose. But if you feel uncomfortable – that’s usually where the magic is happening. It’s important to know the difference between the two. Warm ups: 5 sun salutations, cobra, locust, puppy pose in the wall, puppy pose with elbows on blocks. P.S I’m wearing my favorite legging ever by @teekigram (I’ve had them for 4 years)! They take water bottles and turn them into clothes, giving them purpose again through an eco-friendly process. AMAZING FOR THE ENVIORNMENT. ** Not sponsored* just obsessed???

A post shared by Yoga Instructor•Reiki•Thai YM (@alexzandrapeters) on

This variation of bow pose is always a work in progress for me, and its a pose that I’ve always thought was so beautiful. It took me well over 1.5 years to be able to access this pose (starting from 0 back flexibility and a constant practice). The strap is gift sent from the universe. It gave me the confidence to keep going, to see my progress as my hands kept getting closer and closer to my feet, to get my back and shoulder flexibility progressing. It made me feel comfortable to be where I was each time I practiced this asana – that’s the most important part. Feeling comfortable. It’s so important to never rush a pose, and to accept, breath and find gratitude for where your practice is in the given moment – and if you progress in flexibility, that’s just a bonus ? Warmups: 10 sun salutation, warm up your shoulders, puppy pose, cobra, seal, up-dog, superman, camel, wheel, bridge, bow pose, bow pose variation, high lunge, low lunge, pigeon pose, mermaid pose, hip flexors. Entire front and back body❤️ Tips: *Let the strap be a little loose, then bring elbows forward and hug them into the ears. When you’re ready, kick the feet into the strap. (Notice in the video how my feet are flexed & engaged, this helps the strap stay stable and in place). *Legs are 6 inches apart *Kick, and keep kicking until you are ready to lower *Heart pressed forward *Lengthen the spice, try to avoid compression *Use back muscles to left up *Remember to breathe

A post shared by Yoga Instructor•Reiki•Thai YM (@alexzandrapeters) on

These poses aren’t easy. No pose really is when you’re just learning and trying to figure it out.All asanas take work, patience, practice, breathe, fail, falls, focus, passion, love, forgiveness, gratitude and most of all, time. I like to create these post because it’s important to know that these crazy asanas do not happen over night, most of them take months, even years. To be able to execute one pose (such as this one) you have to work on your entire body, especially the mind. So remember to be gentle with your self, respect your limit and find gratitude for your practice, no matter where you are, in this journey. Warm ups: 5 sun salutations, work on your forward fold for 2-3 minute (standing and seated), triangle, extended side angle, reverse warrior, bound half moon, extended hand to toe, birds of paradise, gate pose, revolved seated wide angle, splits, frog pose, pigeon, all the yummy side bends you can think of ? Wearing @lalalandcomfywear

A post shared by Yoga Instructor•Reiki•Thai YM (@alexzandrapeters) on

A few weeks ago I posted a tutorial on center split, here is another exorcise that I love to do, to work on flexibility!? Be sure to take your time here and do all the proper warmups before hopping into this. It’s a pretty intense (but wonderful) stretch. Make sure your legs and glutes are all the way against the wall and try to leave them there are you start to deepen the stretch. Also, work on keeping a straight(flat) spine. *use blocks to support you’re your body to help you keep that flat back until the hands can come down to the ground. Warm ups: Forward fold, wide leg forward fold, goddess, warrior 2, butterfly, frog pose, center spilt with leg raises (10 lifts each leg), center split. Exorcise: Any time you’re working on splits a great exorcise to work on flexibility is to get to your limit with your split, then engage(squeeze) your glutes, hips, legs and feet- hug everything in. then hold it and breathe for 3 inhales. Relax even thing after the third exhale. – You’ll notice that the sensation in the stretch will ease and you’ll be able to take it a little bit deeper. – I like to repeat the hold and squeeze at least 5 times and that’s usually where my limit is ? (swipe left to see the video for more)??

A post shared by Yoga Instructor•Reiki•Thai YM (@alexzandrapeters) on

Compass pose- one of my favorites because I’m addicted to yummy side body stretches!?? This is one of those poses that took me a long time to figure out how the body got into it & how to feel comfortable without forcing myself (potentially hurting myself, I’ve pulled a few muscles in the past from trying to do this- part of being a home practitioner, not doing my research and not enrolling in YTT??‍♀️?). -Notice how my back is against the wall, creating a straight and supported spine. This is where you want to start. It also help you keep alignment with the top shoulder and reminds you not to let the top shoulder roll forward. Try to keep it pressing against the wall. – I’m using my lower shoulder and pressing it into my lifted leg. – In the full pose, my top elbow is still slightly bent. – my chest is slightly lifted and rotated in the opposite direction of my lifted leg – sit bones are both on the ground & I’m rooting down through the outer shin and knee Tips: – You can work on straightening and bending the arm that’s holding onto the strap (I didn’t do this in the video but it’s a wonderful exercise and helps you understand where your current limit is). – Take your time entering this pose. Use the grounded block if the hand on the ground is a little too much. You shouldn’t feel any pinching or shortness of breath. – Over time, work on straightening out the top are and rolling it up close to the foot. Warmups: 5 sun salutations, Forward fold, triangle, extended side angle, reverse warrior, bound half-moon, extended hand to big toe, bird of paradise, gate pose, revolved seated wide angle, center split Wearing @aloyoga ☺️

A post shared by Yoga Instructor•Reiki•Thai YM (@alexzandrapeters) on

Extended Hand to Big Toe Pose in Half Camel Pose – boy that’s a month full ?. I love how beautiful this pose looks. I think what makes this pose because is everything it took to get to the full expression. So much is going on in this pose. It’s a combination of balance, backbend, shoulder flexibility, core and splits – the entire body. Warm ups: Everything you can possible think of ?.. but really Back: Cobra, up dog, superman, floor bow, dancers pose, scorpion (any variation), fish pose, puppy pose, camel. Legs & Hips: High&low lunge with slight back bend, triangle, revolved triangle, Warrior 1,2,3, Pigeon, hamstring and quad stretches, splits, splits on the wall Take your time, remember, its more about keeping a steady flow in your breath then finding more depth in your pose. BLOCKS: use different levels of the blocks, keep lowering down to different levels when you’re ready too. Then eventually the ground.☺️❤️

A post shared by Yoga Instructor•Reiki•Thai YM (@alexzandrapeters) on

This variation of Parivrtta Janu Sirsasana has been in my top 5 yoga poses for 3 years now. I go bonkers over side body stretches. I absolutely love them ? This post, most definitely is a deep one (but so delicious on the. Key no matter what level you are at in it)!! Warm Ups: twisty three legged down dog (the pose before you drop into Wild Thing), forward fold, extended side angle, reverse warrior, bound half moon, bird of paradise, gate pose, revolved seated wide angle, then This Pose, next pose you could try out would be compass 🙂 *** Notice in the beginning of the video (if you swipe left) I back myself up right against the wall, I’m making sure my back is against the wall, and my top shoulder is pressing against the wall- that’s where you’ll fine that side body stretch. ** You want to try and prevent that too shoulder from caving in – that’s where he strap will come in handy and support you where your current limit is 🙂 ** also, make sure you’re respecting your body’s limit in the pose. Sometimes we like to give ourself that extra push, but you can definitely pull something here if you do that. So be gentle ☺️❤️ Music: Hamakua, by @nahkobear ?

A post shared by Yoga Instructor•Reiki•Thai YM (@alexzandrapeters) on

anjaneyasana – a truly beautiful & super intense pose. ? It's taken me 5 years to be able to do it (and it's no where near perfect or 100% comfortable). But i'm proud of where I'm at and you should be too!?? This is the most effective modification that I've been trying. The blocks support the lift in your chest and the strap helps with the flexibility in your shoulders. You can take it to ANY level when you're ready 🙂 I used 5 blocks here- the height will depend on your height. You want them stacked in between the shoulderbaldes so they press your heart heigh. Warm ups: High lunge, low lunch, pigeon, fire log, goddess, all the splits Cobra, up-dog, superman, variations of puppy pose, bow, bridge, wheel, camel, dancer All the yummy shoulder warmups Swipe left to see video 🙂

A post shared by Yoga Instructor•Reiki•Thai YM (@alexzandrapeters) on

*For beginners* SO often we see these beautiful shapes and we immediately force our bodies to get into them with out warming up, or starting with smaller modifications. – I’ll let you in on a secret, every yogi is guilty of doing this at least once in their lifetime practice. It’s not until you learn how important it is to take your time, not force your body into anything, but rather let your body invite the pose in, WHEN its ready for it. Its super important to lay down the foundation of the pose -that’s why I love using the wheel for this bridge variation 🙂 It’s okay if you’re not even close to the “goal” photo, and it’s just fine if you’re not even close to the practice phone. Every pose takes time, breath, patience and nurturing. Keep practicing and all with come my friends ? * When doing this pose on wheel, work on bringing the shoulders over the elbows, pressing the heart forward. You”lol really have to press into the feet to find that movement. *Keep your belly pressing up towards the sun☀️❤️ *Hug your elbows in. Warms ups: 10 sun salutations – (you can find on YouTube) Cobra Up-dog Superman Puppy pose + modifications Floor bow Camel Wheel Bridge

A post shared by Yoga Instructor•Reiki•Thai YM (@alexzandrapeters) on

There are so many ways to warm up your center split, here is one of my favorite ways! Of course it’s against the wall ? Splits take a lot of work, they really need your time and devotion if you want to gain flexibility, and even to maintain the flexibility. Come to a straddle against the wall Legs want to me straight out, and spine long Work on hinging at the hips, bringing your forehead to the wall with a straight spine. – If this easy for you, scoot in closer. – If your pelvis is touching the wall, place blocks under both heels Once you are in your split squeeze your hips muscles for 5 seconds, then relax them. Do this for 5 rounds and you’ll see a huge difference in the depth you can go. Come into your spilt and out of it 5 times. Holding each time for 1-2 minutes *Try to relax your face muscles when you’re in the pose stretching & create a smooth deep inhale and exhale. Completely filling up and fully emptying out the breath.❤️❤️

A post shared by Yoga Instructor•Reiki•Thai YM (@alexzandrapeters) on

Let’s talk Warrior 3 – hard AF when you’re a beginner! Trying to figure out how to balance, what to engage, where to put your hands, where to look and how the F to create a straight line ??. It takes time my friends & a lot of trial and error. I really love using the wall as a prop of this one & also setting a mirror up so I can see my form (it’s helps you see where you should realign your body, what to engage more and less of). Find the correct alignment on the wall, hold it for 5-10 rounds of breath 3x to gain muscle memory in correct alignment 🙂 Swipe left to see how I got Into it and how you can find your distance away from the wall! ?☺️ Hints: • Think length – reaching with the extend foot as well as with the palms. • Hips are squared & facing the ground. • Everything is engaged • Sight bend in the standing knee. • Focus more attention on your breath then the pose. Relax your face and keep a steady calm inhale and exhale ❤️

A post shared by Yoga Instructor•Reiki•Thai YM (@alexzandrapeters) on

Working on Kapotasana? Try out this modification with the yoga wheel, it’s a wonderful prep for the full pose! Be sure to do all the yummy warmups before getting into it, your front and back body want to be completely open and warmed up. So that means: Stretching your shoulders, hammies, quads, upper and lower spine, hip flexors. – Once you lean back onto the wheel and find that you can’t yet grab the wheel, feel free to place a strap (or Belt) inside the wheel and grab onto that. Over time you can work on walking your hands closer to the wheel so you can grab it. – Work on pressing the hips forward and glutes off of the wheel, finding length and opening the heart space. – Take your time here, repecte your body and don’t try and force the pose ☺️❤️ Swipe left to see how I got Into it :)!

A post shared by Yoga Instructor•Reiki•Thai YM (@alexzandrapeters) on

Good Morning Friends!! Happy Thriving Thursday ??☺️ I’ve had a lot of request to do a tutorial on scorpion, so here it is for you! Please keep in mind that these are super short tutorials and WARM UPS are very important to the practice pose so please be gentle on your body and don’t hope right into this before warming your beautiful body up! ? •Set up the block ( or a book that’s 4×6) fairly close to the wall, because you’ll be using you feet to press the into the to actively bring your chest more forward (about 18 inches away from the wall give or take). •Place the block between the crevice of your thumb and point fingers, hold onto the block (this will help draw the shoulder blades down the back and wrap them around keeping them in alignment). •Once you’re up, find your bend and actively press both feet into the wall (keep them together) while pressing your chest back and bringing your nose forward. (REMEMBER TO BREATHE). • If you’re feeling okay here, continue to walk the feet down the wall while still actively pressing both feet into the wall, while pressing your chest back and bringing your nose forward to deepen the bend. And then if you want too, you can reach one foot towards the head. •This pose is more of contortion posture because you need to life your view forward, trying to stair directly at the wall in front of you and not at the ground. •Take your time here, do the proper warm ups and open the entire front body as well as the back before getting into this. •••WARM UPS••• Lunges + variations – high/low + with a back bend (really open up your quads, they play a big roll in this), cobra, seal, up-dog, superman, bow, camel, wheel, standing back bend, dolphin, plank.

A post shared by Yoga Instructor•Reiki•Thai YM (@alexzandrapeters) on

Eka Pada Koundinyasana II AKA fancy arm balance ? I actually really love getting into this arm balance, and once you figure it out, you can transition really beautifully into other postures (3 leg down dog, chin stand, other arm balances). But notice what I said, “once you figure it out”. This pose is one that will make you re-question arm balance and how they work. Warm ups: *Hips, Hammies & Quads – high/low lunge, low lunge & try bringing your heal closer to your booty, forward fold, triangle, revolved triangle, pigeon, goddess, center split, forward spilts, prog pose *Stretch & strengthen your wrist for 3-5 minutes *Heat up your core (this pose demands the use of your core) plank pose for 1 minute, boat pose 30 seconds, hallow body hold for 1 minute, chaturanga hold for 30 seconds. Helpful tips: ¡ Keep the entire body engage ¡ Think lengthen (especially through the legs) ¡ Chest pull forward and drops a little. As the chest drops you’ll notice that the bag leg will start to lift. This is how you will find your center balance ¡ Be careful to not let shoulders drop–keep the shoulder heads even and the gaze straight forward.?❤️

A post shared by Yoga Instructor•Reiki•Thai YM (@alexzandrapeters) on

Man, I do love me some pincha practice! The first time I saw it and tried it I was immediately addicted to the practice. It took me well over 2 months of practicing every day to be able to hold it for 15 seconds away from the wall. It’s also taken me 4 years of practicing it at least 2x a week to get where I am today in my pincha practice (and it’s definitely not perfect by any means.. just more stable) SO MUCH goes into it. Warm ups: Warm up your splits – see my split video for poses Shoulders – Puppy pose, all variations, holding plank for 3 30 second rounds, holding dolphin for 3 30 second rounds, 1 minute hallo body hold. Help pointers: View stays in between your thumbs Push your shoulders away from your body as much as possible Engage everything (especially your core) to help find stability Remember to breathe · Try out different hand placement (prayer hands, dolphin hands, clasped hands) Swipe left to see the video of how to get into it ?

A post shared by Yoga Instructor•Reiki•Thai YM (@alexzandrapeters) on


You May Also Like:

Brazilian Fitness Model & WBFF Pro, Gabi Castrovinci | Training Clips | Pictures
The Power Of Breath: Yoga's Psychological Benefits By Anjali Mehta
One On One With Yoga and Personal Trainer, Ishwari Patil
The Fit Five! 5 Things I Wish I Knew When I Started Calisthenics

Comments & Reactions