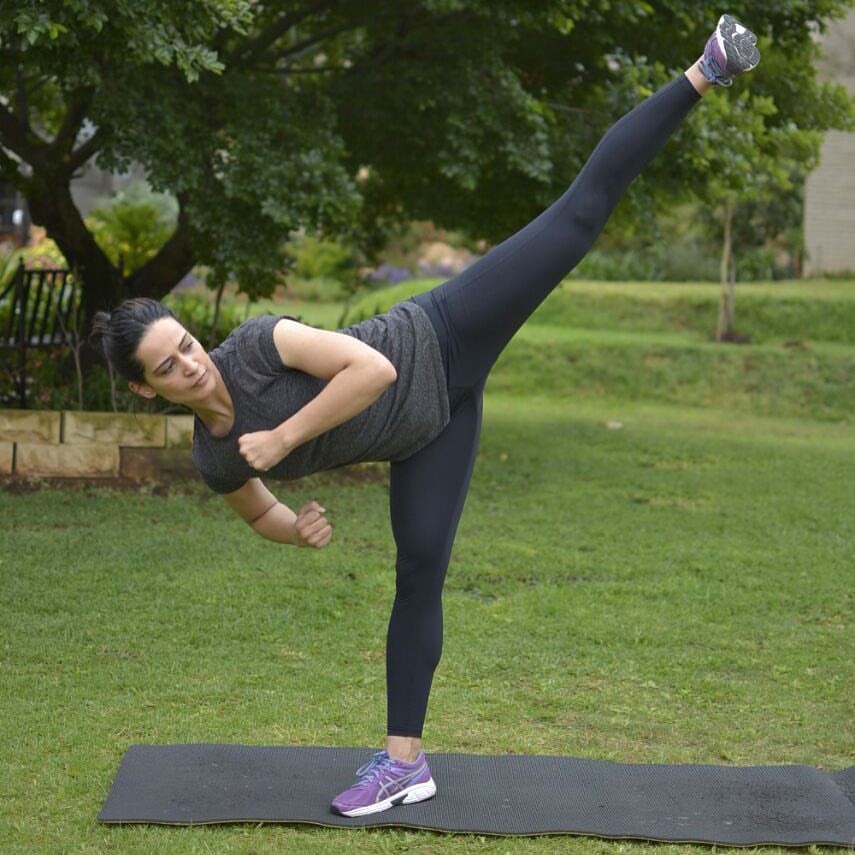
The word yoga means that it is a combined form of mind and body practice. Yoga is of different types, and discipline must be followed while one is doing yoga. The word flexibility means that the person must have the capability to bend easily.
This means that the person bends without breaking their body parts which means without folding the leg or hand. Flexibility can be both advantageous and disadvantageous in Yoga.
The advantage is that it prevents pain in the back and also prevents injuries occurred due to sports or any other kind of work. The disadvantage is that when a person possesses more flexibility from before they can become overconfident. The person then starts to perform asanas or postures which are quite difficult, which one is not supposed to do at the beginning. The person doing yoga must start practicing the basic postures and then gradually move on to the more advanced and difficult ones.
People think that those lacking flexibility are unable to do yoga. This I would say is a common misconception about yoga by people. If they practice yoga daily then flexibility would gradually increase. Fitness also gets enhanced through it.
If you are unable to move your shoulders, hips, or hands properly then yoga is the best option to improve yourself. Flexibility is part of physical fitness. It helps to gain energy and decrease tiredness in the body. Yoga for flexibility is also advantageous for the mental health of our body. It releases stress and makes you feel relaxed.
Many yoga poses will make the person more flexible. It is important to note that the yoga postures or asanas that will help us in increasing flexibility will have to be practiced regularly.
The 9 Best Yoga Poses To Be More Flexible:
1. Supta Padangusthasana
This posture or asana is also known as ‘reclined hand to big toe pose’. A person requires a strap which is used for yoga purpose. If one does not have a strap then he or she can use a belt to do the posture. In this posture, a person should keep his or her leg straight. They must try to straighten their legs as much as they can.
First, a person must lie down on his or her back with bending their knees and both the feet on the floor. Then one’s right knee should be hugged in toward his or her chest. A yoga strap must be present around the instep. Following that the right leg should be extended and straightened up towards the ceiling that is upwards.
After that, if one wants then he or she can extend the left leg. A hand must be kept on the thigh on the left that helps to keep the hip flat on the mat which is used in yoga purpose. One should keep this in mind that the right femur, as well as the right humerus of the hand, must be placed in sockets. The similar steps are being followed by the left leg after five to ten breaths when doing with right leg.
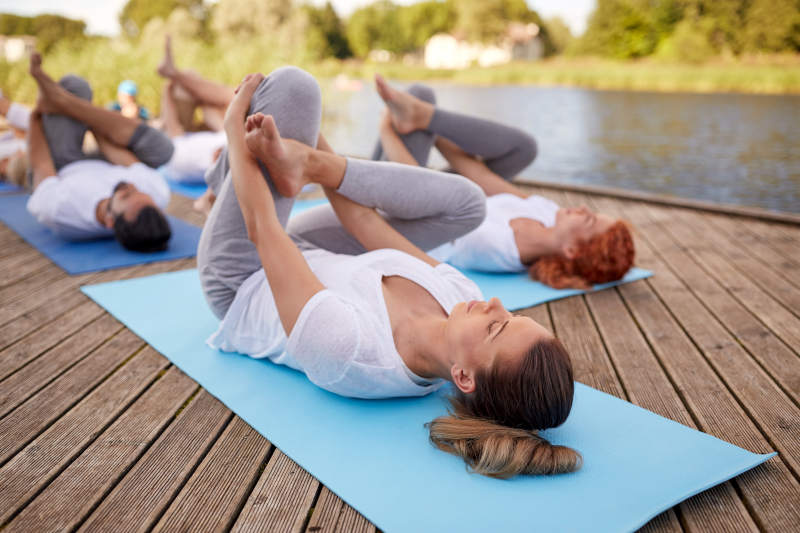
2. Sucirandhrasana
This pose is done to stretch the flexors of the hip in a very calm or in a gentle manner at first. Then this same process is done more deeply to increase flexibility.
First, a person must lie on his or her back and then put the feet on the floor. After that, the ankle at the right is placed on the top of the left thigh. The knee on the right should be opened to the right too. Then gradually the left foot is tried to bring towards the chest. Following that, the left knee is drawn closer to the chest. The help of the right elbow can also be needed to nudge the knee away from the chest. After that, the activation of both the feet cannot be stopped. Then legs are allowed to attain relaxation after five to ten breathes.
3. Adho Mukha Svanasana
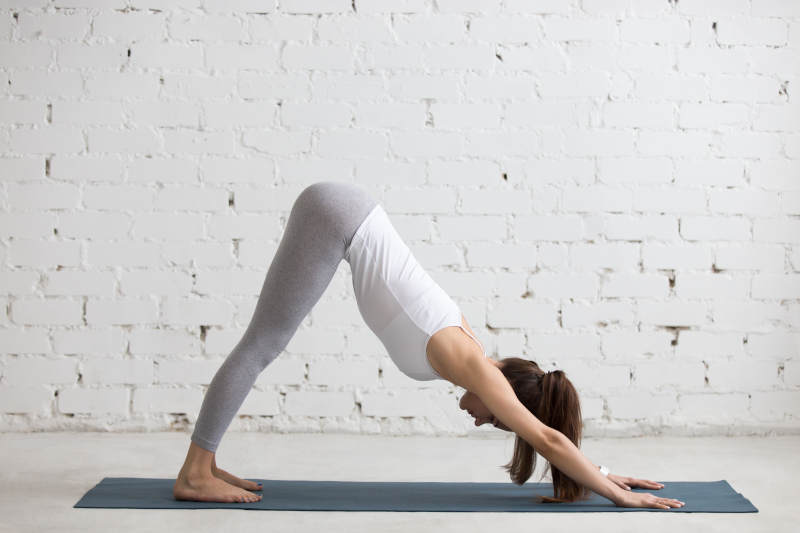
This asana is also known as ‘downward facing dog’. This good is beneficial for everything. First, the knees are slightly kept behind the hips. Then one should try to come towards his or her own hands and knees. After that knees are to be lifted from the ground and then toes are being curled. Following that the legs are straightened to rise upward i.e. towards the ceiling. One foot must be pedalled at a time. Then settle with the posture for five breaths and then the body must be released. One should maintain the body posture while doing the asana that is in V-shaped format.
4. Anjaneyasana
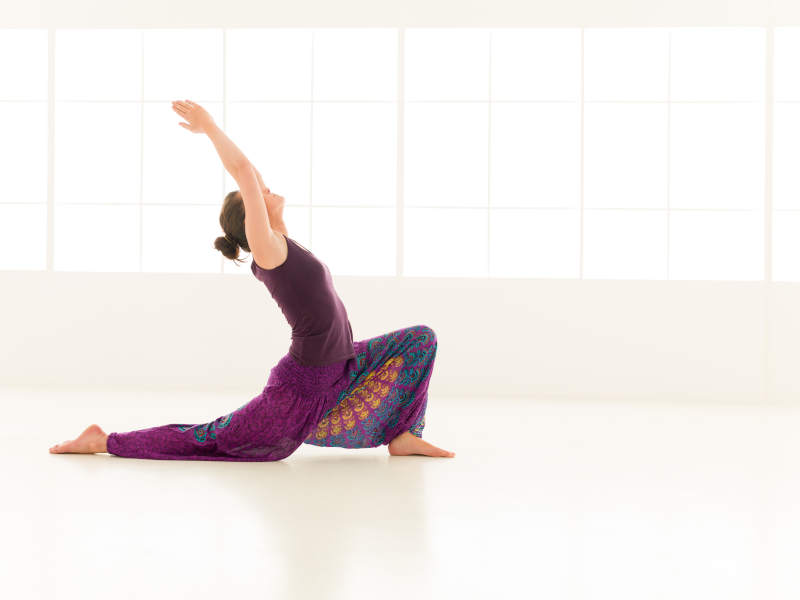
This asana is also known as ‘crescent lunge’. First, the right foot is brought forward and then kept inside the right hand. The foot can be made help to the front. Then the knee to the left is lowered in the mat. Following that breath in while lifting the arms upward. They must be reached upward. Consecutively, shoulders must be moved down. If one wants to do a deeper stretch of the hip then the knee to the right is kept ahead of a little. Lastly, a person should be in the final posture for three to five breathes before relaxing.
5. Parsvottanasana
This asana is also known as ‘pyramid pose’. Props are necessary for doing this asana. This should be kept in mind that both points of the hip will be faced in front of the mat in this asana.
In this posture, one should step the right foot out and kept it inside the right hand. Then the left foot is stepped out. Following that the left heel must be lowered so that the toes are rotated to about 45 degrees. After that, the legs are straightened when hips are lifted. This process is repeated by increasing the exhales and inhales for about 5 breathe. Then do the same thing with the other side.
6. Ardha chandrasana
This posture is also known as half-moon pose. It is essential to learn how to balance our body. First, the foot on the right is stepped out and moved inside the right hand. The knee in the right should be kept easy when the right hand is kept forward of about 5 to 10 inches. Then the left hand is brought to the left hip. Then the foot is lifted upwards from the ground. The left hip is stacked over the right hip. Then the left leg is raised parallel to the floor. Following that the left arm is being lifted. The other side is being tried after around 5 breathes.
7. Malasana
This posture is also known as ‘garland pose’. This posture is done on a mat which is used in yoga. First, the feet must be kept 12 inches apart and then must stand in front of the mat. After that toes are turned and both the knees are bent to acquire the posture or position. Following that the elbows are brought inside the knees. Utilise elbows to keep the knees in position.
8. Ardha Matsyendrasana
This posture is beneficial for our rib cage which is present in front of the body and also the back of the body i.e. the spinal cord.
First, we should sit with legs crossed and then the right leg is brought outside from the left thigh. Following that breath in with both arms raised and then exhale when twisting to the right. The spinal cord should be kept stretched and both the arms are held behind the head. One must release the body after 5 to 10 breathes and must try to do the other side.
9. Gomukhasana
‘Cow face pose’ is another name of this asana. This is slightly different from the postures that are being done by the practitioners. First, one must be seated. Then right knee is kept on top of the left knee which is kept in the mid of feet. After that, the right arm is being lifted upwards and elbow is bend so that the hand is present behind the head of the person. The left arm is again kept back in the same process. The elbows are brought behind the head and tried to join. After 5 to 10 breathes the sides are reversed.
These are the yoga poses that help the practitioner to become more flexible and fit enough to lead a better life. It also increases the confidence of the person and reduces stress and even anxiety.
Author bio
Vivek Roy is an enthusiastic Yoga blogger and Traveller from India. He has done yoga classes in india. He loves to travel and share the knowledge of yoga around the world. For more information about him visit his website Vedic Yoga.


