


Foam rolling is a technique used to ‘massage’ your muscles, which can become very tight and tense from exercising, by using your body weight to apply pressure to certain muscles.
This practice can be used to ease muscle tightness and knots, help with elongating your muscles and even aid in their recovery. It is quite a simple technique to use and all you need is a foam roller. Most gyms nowadays have a few of them, but if you want your own they are not too difficult to find in most sports stores.
There is not too much research to support beneficial results of foam rolling in terms of increasing athletic performance and muscle lengthening. BUT, I still think it can be used as an aid to warm up your muscles, a form of therapeutic massage and an aid in increasing flexibility. At least that is what I have found with my own experience. So I would say it is worth a try, thereafter you can make up your own mind depending how it works for you.
Below, we first briefly look at some of the benefits that are commonly associated with foam rolling, and then we explain how exactly to use a foam roller effectively, to target a few different muscles. Lastly there is a video done by Ifbb pro Kelly Gonzalez demonstrating a few ways to use a foam roller.
Check out her website here: KellyGonzalez.com
Now if you have been training regularly and have never done this before or have never been for any kind of deep tissue massage, I suggest you ease into it and initially do not apply too much pressure. The reason being, sometimes certain muscles can be really tight and it can be a bit painful at the start. So just be aware of this as you begin.
Some of the benefits of foam rolling include:
- Increased blood flow to muscles
- Helps reduce muscle soreness
- Aids in increasing flexibility
- Helps ‘loosen’ muscles
- A therapeutic de-stressing massage
How to use the foam roller:
For each method I would suggest holding each position on that ‘tense spot’ for anywhere between 20 to 60 seconds. (I find some spots are more painful than others thus the less painful ones you can manage to hold for longer.) You can do this before or/and after a workout a few times per week depending on you.
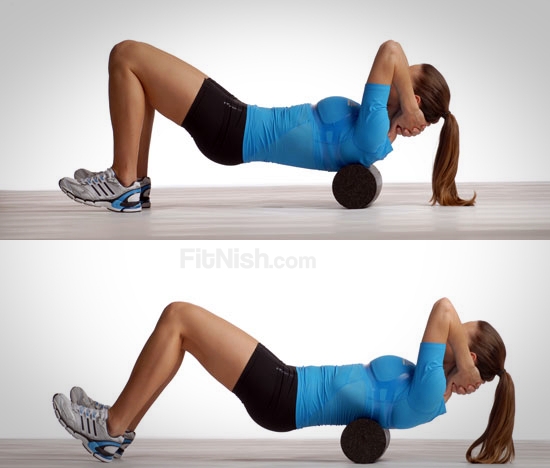
1. Back
Place the Foam Roller on the ground and place (with you perpendicular to it) your lower back on it. Bend your knees like you are about to do a sit up and then roll the foam roller back and forth along your back slowly. When you feel spots where it is slightly more tense or tight, hold that position (the ‘tense spot’) for a few seconds.
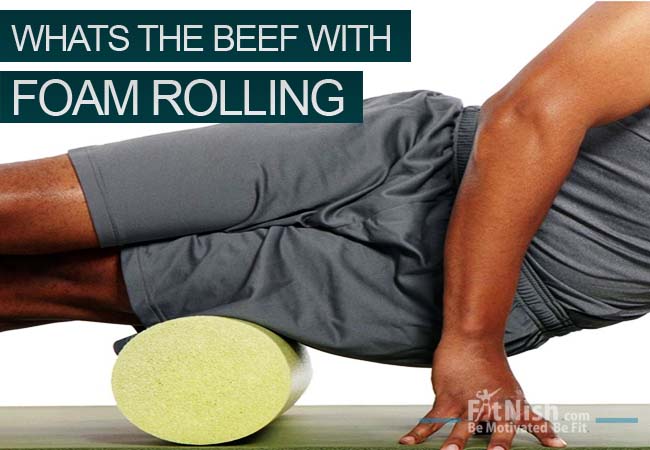
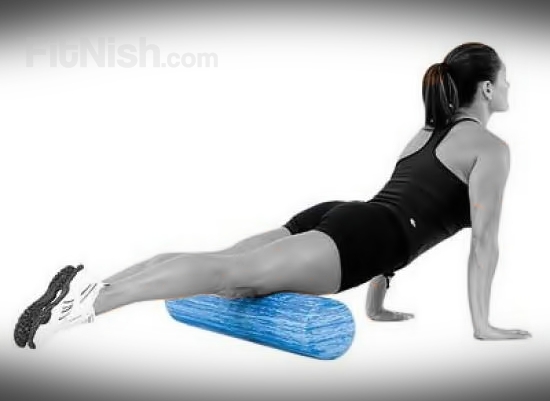
2. Quadriceps (Thighs)
Place the foam roller on the ground and lie on it belly down (your body perpendicular to it again), with your thighs in direct contact with the foam roller. Now roll it forwards and backwards along your thighs slowly. When you feel spots where it is slightly more tense or tight, hold that position (the ‘tense spot’) for a few seconds.
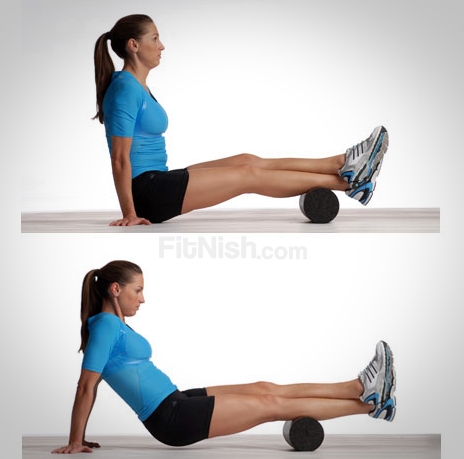
3. Calves
Place the Foam Roller on the ground and place (with you perpendicular to it) one of your calves on top of it. Cross the other leg over the one in contact with the foam roller. Now proceed to roll the foam roller back and forth along your calf slowly. When you feel spots where it is slightly more tense or tight, hold that position (the ‘tense spot’) for a few seconds.
Repeat with your other calf.
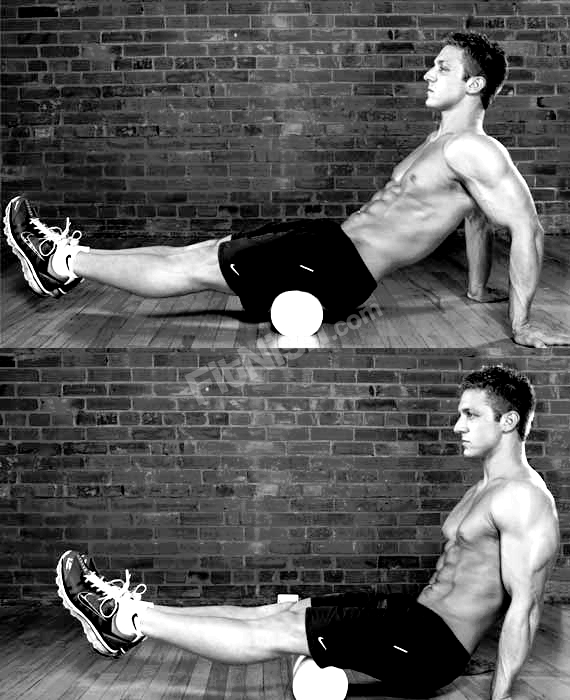
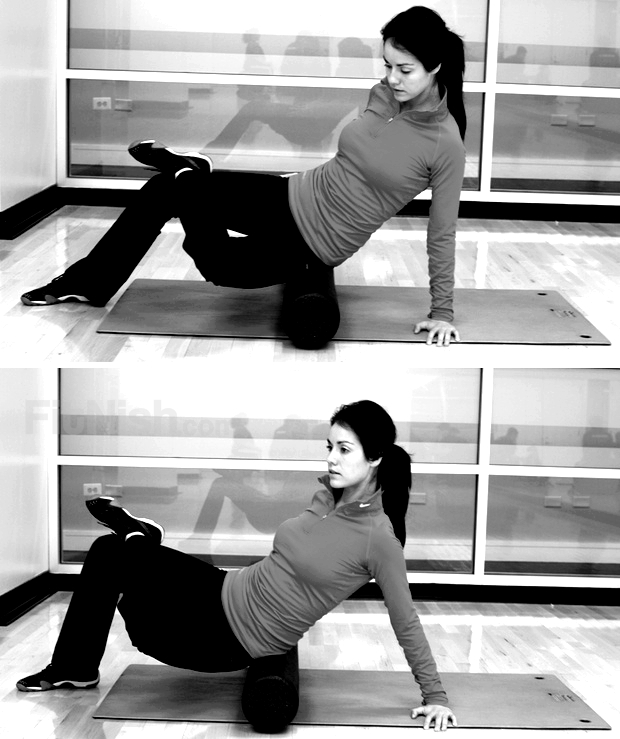
4. Ham strings and Glutes
Place the Foam Roller on the ground. Proceed as you would if you were rolling out your calves but instead of placing the roller under your calf, place it under your hamstrings, with both legs in contact with the foam roller. Now roll it forwards and backwards along your hamstrings, slowly. When you feel spots where it is slightly more tense or tight, hold that position (the ‘tense spot’) for a few seconds.
For your glutes, place the Foam Roller on the ground. Sit on the foam roller so your glutes are in contact with the roller and cross your one leg over the over placing the crossing leg’s ankle on the opposite leg’s knee. Now lean slightly to the side of the crossed leg and roll the foam roller back and forth along your glutes, slowly. When you feel spots where it is slightly more tense or tight, hold that position (the ‘tense spot’) for a few seconds.
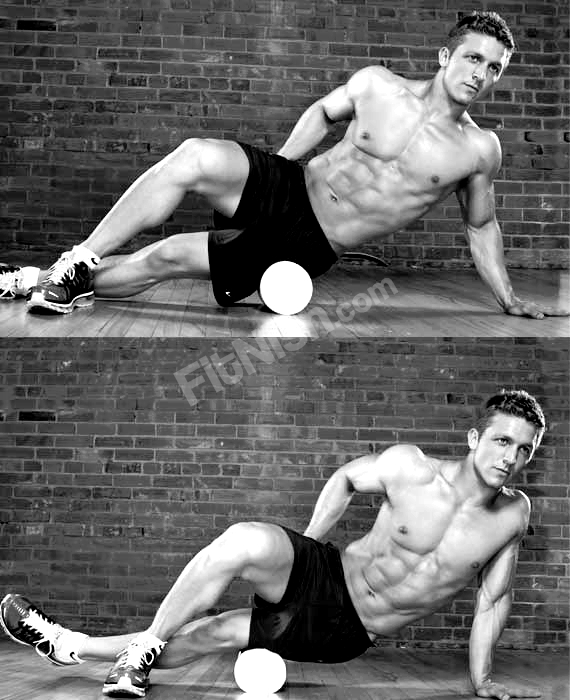
5. Sides, IT band. (Iliotibial Band)
Place the Foam Roller on the ground and (with you perpendicular to it) get into a position like you would for number 2 above (for your thighs). Then roll onto one side, so the side of your one leg is in contact with the foam roller. Then cross over the opposite leg placing your foot on the floor and your opposite hand (or elbow) on the floor above the foam roller. Now proceed to roll the it back and forth along your side, slowly. When you feel spots where it is slightly more tense or tight, hold that position (the ‘tense spot’) for a few seconds.
Repeat with the opposite leg.
Instructional Video | Foam Rolling- Self Myofascial Release @Kelly Gonzalez